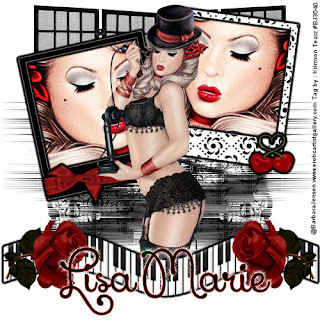
MATERIALS USED :
PSP XI
PLUGINS : DSB FLUX AND EYE CANDY 4000
SCRAP KIT: HOLLYWOOD GLAM MADE BY THE TALENTED WICKED PRINCESS http://www.wickedprincessscraps.blogspot.com
TUBE : BARBARA JENSEN'S CALL ME www.barbarajensentubes.com
Open a new transparent canvas 500x500
Copy and paste WP_HG_POLOROID as new layer.
Rename layer "frame" and resize 70%. Make sure all layers is not selected.
With your frame layer selected go to your Eye Candy 4000 and select gradient glow
Apply the following settings :
Glow Width : 3
Soft Corners : 75
Overall Opacity : 100
Draw only outside selection : check
In the color tab select FAT and both colors should be black. Apply
Now copy and paste WP_GH_PP8 as a new layer and resize 50%.
Position the paper layer behind the frame and adjust the size so it covers the
entire opening on both frames. Now duplicate this layer and name
Paper 1 and 2. Hide the paper layers.
Make your frame layer active and with your magic wand tool select the inside of the frame.
Selections, modify, expand by 7 now invert.
Make your paper 1 layer active and hit the delete bottom.
Select none. Now repeat the section steps on the other side of the frame.
On the top paper layer merge down so both papers are one now.
Okiedokie now then .. take your close up tube and copy and paste as new layer. Position
this into one of the frames to your liking. You may want to shrink it some or just leave it the way it is.
I just left mine be. Now we are going to do the "paper/frame" steps again but this time with just the frame and tube.
Hide your tube layer and paper, select your frame layer, magic wand inside the frame, modify,
expand, invert. Make the tube layer active and delete. Now repeat with the other side.
You may want to mirror the image. When you paste the tube layer, this time make sure your Raster layer is selected before you do so.
Merge your 2 tube layer together and make sure that layer is selected.
Crop around the entire tag. Duplicate your tube layer and on the top layer change
your blend mode to overlay. Merge the 2 tube layers again. Now merge the tube with the paper and then the paper
with the frame. Move your frame layer to the top of your canvas.Copy and paste WP_HG_PIANOKEYS as new layer and resize 70%
add the same gradient glow you placed on the frame. You may need to shrink your keys a pinch.
Copy and paste WP_HG_ROSE, free rotate right 45, resize 25% and position
in bottom right corner over your piano keys. Duplicate and mirror. Copy and paste WP_HG_STAIRS,
resize 50% and position as bottom layer ... well not behind the raster layer of course. Position as shown above.
With your eraser tool erase the small part of the stairs sticking out behind the frame on the left. Apply DSB Flux blast with the following settings:
Left and 20 % Copy and paste WP_HG_DIVIDER position behind your stair layer and position so it is peeking out at the top.
Erase all but the very top.Copy and paste WP_HG_CHERRIES and resize 19, gradient glow and position
in the bottom right, right side of frame.
Copy and paste WP_HG_BOW as new layer, resize 19, gradient glow and place at the bottom of left frame.
I just played with the angle until it looked good.
Add any text you would like but make sure to add all ©


