Check this out.

Sunday, April 14, 2013

Kiss Me


Kiss Me

Supplies Neeed :

Scrap Kit: Love Me Green by Vishuous Phury Designs at Whimsical Divas
Mask:158 by my all time fav WeeScotlass http://weescotslasscreations.blogspot.com/
Tube: Heaven or Hell 02 by the talented Ismael Rac
PSP XI
Animation Shop
Eye Candy 4000 Gradient Glow

Open new blank image 500x500 and flood fill white.
Create a new raster layer, selections, select all >
Copy and paste VPD  Love Me Green TS Papers02 into selection > select none >
merge group > duplicate > on the bottom mask layer adjust - add/remove noise
 - Gaussian - monochrome - 49% > on your top mask apply noise once more but adjust to 60% >
copy and paste VPD  Love Me Green TS Elements26 as new layer > resize 50% > apply gradient glow to the frame
with the following settings :


Hide your two mask layers and make your frame active > magic wand and select inside the frame >
selections > modify > expand 15 > new raster layer > make sure the new layer is active and paste
VPD  Love Me Green TS Papers05 into selection > position behind frame > select none > copy and paste HeavenOrHellHD02
as new layer > resize 70% > position behind frame and center> duplicate tube and move one
tube above frame > add a drop shadow to this bottom layer > hide top tube layer > with your eraser tool
erase the bottom half of tube that hangs beneath the frame > make top tube visible > erase part of the tube that hangs over the bottom half of frame >copy and paste VPD  Love Me Green TS Elements112 as new layer > resize 30% and add gradient glow as before > position in bottom right corner > copy and paste VPD  Love Me Green TS Elements83 as new layer > resize 50%
and add gradient glow > duplicate and mirror > merge the two together and position at top of frame beneath
all by the mask > copy and paste VPD  Love Me Green TS Elements109 > resize 50% and gradient glow > position on left side and duplicate > move one layer beneath the frame and paper and leave one on top of frame > with your eraser tool erase on the top layer the part that comes up over the dress >


copy and paste VPD  Love Me Green TS Elements122 as new layer > resize 20% > gradient glow > position at bottom right of frame > copy and paste VPD  Love Me Green TS Elements19 as new layer > resize 10 % and position at the top right of your hat > gradient glow > copy and paste VPD  Love Me Green TS Elements81 as new layer > gradient glow > resize 15% position as show > ADD ALL © and any txt you wish.

Open Animations shop > make sure your top mask layer is hidden and copy merge > paste into animation shop as new animation > back in psp make your hidden mask layer visible and hide the other > paste after current frame in animation shop > save.

All through all done :)

Friday, April 12, 2013

BARTENDER

 Bartender


Supplies Needed:

PSP XI
PTU Scrap Kit Hollywood Glam by WickedPrincess ...You can grab it http://www.wickedprincessscraps.blogspot.com
Tube of Choice. I am using the beautiful work of Jessica Daugherty titled Ruby Martini
Mask 144 by MY ALL TIME FAVORITE MASK MAKER .... WeeScotLass
Eye Candy 4000 - Gradient Glow and Xenofex 2 - Constilation


Open new blank canvas 500x500
New raster layer and flood fill black
New raster layer > selections > select all > copy and paste WP_GH_PP1 into selection >
selection > select none > layers > new mask layer from image > make sure source luminance is selected and invert
mask data is NOT selected > merge group > rename this layer mask > duplicate > on the bottom layer (original mask)
apply Alien Skin Xenofex 2 Constellation with the following settings :
On your top mask layer > adjust > add/remove noise with the settings set to random and monochrome selected and 50% > merge down > copy and paste tube as new layer > resize 90% and position at the top and center of tag > copy and paste WP_HG_HEARTBOWFRAME as new layer and resize 70% > drop shadow set to white, opacity 83, blur 90 and make sure the drop shadow is on an new layer > duplicate heart layer and position one above the tube and one below > on top layer erase the top part of the heart covering her head and hair > make tube layer active and erase the part of her arm and body sticking out from the heart on the left > copy and paste WP_HG_FAN as new layer > position as top layer > mirror > resize 30% > apply Eye Candy Gradient Glow with the following settings :

Copy and paste WP_HG_FLOWERS1 as new layer > resize 30% > grad. glow same settings > position behind fan and on the right > duplicate > mirror and reposition on the left of fan as shown :
merge the flowers and fan down into one image > duplicate > mirror and position as shown :
Copy and paste WP_HG_CHERRIES as new layer > resize 30% > position below all layers except the background and mask and position as shown.

Add any text you wish AND ALL © INFO !!

Sunday, March 31, 2013

Hollywood Love Affair


MATERIALS USED :
PSP XI
PLUGINS : DSB FLUX AND EYE CANDY 4000
SCRAP KIT: HOLLYWOOD GLAM MADE BY THE TALENTED WICKED PRINCESS http://www.wickedprincessscraps.blogspot.com
TUBE : BARBARA JENSEN'S CALL ME www.barbarajensentubes.com

Open a new transparent canvas 500x500
Copy and paste WP_HG_POLOROID as new layer.
Rename layer "frame" and resize 70%. Make sure all layers is not selected.
With your frame layer selected go to your Eye Candy 4000 and select gradient glow
Apply the following settings :
Glow Width : 3
Soft Corners : 75
Overall Opacity : 100
Draw only outside selection : check
In the color tab select FAT and both colors should be black. Apply
Now copy and paste WP_GH_PP8 as a new layer and resize 50%.
 Position the paper layer behind the frame and adjust the size so it covers the
entire opening on both frames. Now duplicate this layer and name
 Paper 1 and 2. Hide the paper layers.
Make your frame layer active and with your magic wand tool select the inside of the frame.
Selections, modify, expand by 7 now invert.
Make your paper 1 layer active and hit the delete bottom.
Select none. Now repeat the section steps on the other side of the frame.
On the top paper layer merge down so both papers are one now.
Okiedokie now then .. take your close up tube and copy and paste as new layer. Position
this into one of the frames to your liking. You may want to shrink it some or just leave it the way it is.
 I just left mine be. Now we are going to do the "paper/frame" steps again but this time with just the frame and tube.
Hide your tube layer and paper, select your frame layer, magic wand inside the frame, modify,
 expand, invert. Make the tube layer active and delete. Now repeat with the other side.
You may want to mirror the image. When you paste the tube layer, this time make sure your Raster layer is selected before you do so.
Merge your 2 tube layer together and make sure that layer is selected.
Crop around the entire tag. Duplicate your tube layer and on the top layer change
your blend mode to overlay. Merge the 2 tube layers again. Now merge the tube with the paper and then the paper
with the frame. Move your frame layer to the top of your canvas.Copy and paste WP_HG_PIANOKEYS as new layer and resize 70%
add the same gradient glow you placed on the frame. You may need to shrink your keys a pinch.
Copy and paste WP_HG_ROSE, free rotate right 45, resize 25% and position
 in bottom right corner over your piano keys. Duplicate and mirror. Copy and paste WP_HG_STAIRS,
resize 50% and position as bottom layer ... well not behind the raster layer of course. Position as shown above.
With your eraser tool erase the small part of the stairs sticking out behind the frame on the left. Apply  DSB Flux blast with the following settings:
Left and 20 % Copy and paste WP_HG_DIVIDER position behind your stair layer and position so it is peeking out at the top.
Erase all but the very top.Copy and paste WP_HG_CHERRIES and resize 19, gradient glow and position
in the bottom right, right side of frame.
Copy and paste WP_HG_BOW as new layer, resize 19, gradient glow and place at the bottom of left frame.
I just played with the angle until it looked good.
Add any text you would like but make sure to add all  ©

Friday, September 16, 2011

Beyond All Hope


SUPPLIES NEEDED
PSP ( I am using XI )
PTU Tube : Jac-eek by the wonderful Gemini Creationz. I had a hard time picking one but you can find it  HERE.
PTU Scrap Kit : Hocus Pocus by the talented Mystical Illusionz. You can pick this kit up HERE.
Mask401 by Vix. I just love her masks!! Grab it HERE.
Filters : Eye Candy 4000 Gradient Glow
Xero - Radiance 
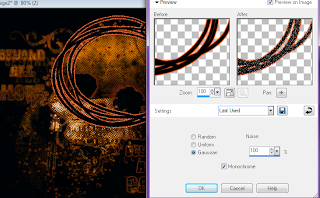
Open new blank canvas 600 x 600 and flood-fill black - selections - select all - float - defloat - new raster layer - copy and paste miz-pp23 into selection - select none - layers - new mask layer from image - mask401 source luminance selected and all others deselected - merge group and name layer mask - apply gradient glow to your mask layer with the following settings : 


Copy and paste miz-frame3 as new layer - resize 70%  - hide your mask and canvas layer - with your eraser tool erase the long piece on the frame - mirror - make other two layers visible -  position at top-right of canvas kind of over the skull - duplicate and rename the top frame 1 and the bottom 2 - gradient glow with the same settings as before but opacity set to 100% on frame 2 - duplicate frame 2 two more times for a total of 3 gradient glow frames - rename the last two 3 and 4 and position in order - make frame 2 active - adjust - add/remove noise with the following settings :


Repeat your glitter steps on the last two frames but change your % lvl each time - copy and paste your tube as a new layer and resize 70% with the following settings :
Position in center of the frame and name tube 1 apply Xero Radiance with the following settings :
duplicate and name tube 2 - position tube 2 as your top layer and hide - make tube 1 active and with your eraser tool erase her arms and legs that hang beneath the frame - make tube 2 layer active and erase all of the bottom half so she is positioned behind the frame -  with your crop tool select around entire image to clean up from the tube - copy and paste miz-ghost2 as new layer and resize 70% and position as shown : 
Your ghost layer should be behind your frame layer - copy and paste miz-spookyeyes as new layer and position behind all layers except your black canvas and move to the very bottom of your tag - copy and paste miz-candle - mirror - resize 15% and add a yellow drop shadow... you can play around with the opacity until you like it - copy and paste miz-candle2 as new layer - add the same dropshadow and resize 15% - position your two candles in the bottom left of your tag making sure these are your top two layers - copy and paste miz-doodle as new layer - resize 30% - mirror - gradient glow with the following settings :


position between your 2 candle layers - copy and paste miz-spider as new layer and resize 15% - gradient glow with the same black settings - position at the bottom of your candle layers - add all © and txt - now open animation shop - back in psp hide frame 2 - copy merged - paste into animation shop - back in psp unhide 2 and hide 3 - copy merged and paste after current frame in animation shop - save.

Monday, September 12, 2011

Vicki


Supplies Needed

PSP ( I am using XI )
PTU Tube : Lotus by the wonderful Gemini Creationz. I had a hard time picking one but you can find it  HERE.
PTU Scrap Kit : Uninteded by the talented BlackWidowcreationz. You can pick this kit up HERE.
Mask 92 by Vix. I just love her masks!! Grab it HERE.

Filters : Eye Candy 4000 Gradient Glow

ok lets get started. Open new blank canvas 600 x 600 - flood fill black - copy and paste Paper4 as new layer - do not resize - layers - new mask layer from image - vixmask92 - source luminance selected - merge group - duplicate your mask layer 3 times and merge all mask layers down - copy and paste Image36 as new layer and resize 90% with the following setting :
Copy and paste Image25 as new layer and resize 75% with all the same settings - free rotate 90 left - copy and paste tube as new layer and position in center of frame and drag down so her head is just over the top - add a drop shadow with the following settings : 
duplicate tube and position one on top of frame and one beneath. 
To make things somewhat easier lets rename our layers :
From top to bottom - 
Tube 1
Frame
Tube 2
Stars
Mask
Canvas

Now with your crop tool crop around the entire canvas on your tube layers - hide tube 1 - erase the bottom half of tube 2 - make tube 1 active - erase the bottom half of tube 1 but very carefully erase around her hand - ok now it is up to you but I went and erased all the other part of tube 1 that caused a dark drop shadow - copy and paste Image8 as new layer and resize 85% - rename curtain and position behind tube 1,2, and frame - copy and paste Image9 as new layer - resize 85% - position in top left corner behind all layer except canvas - rename moon - duplicate - change top moon blend mode to dodge- merge your two moon layers - copy and paste Image22 as new layer - position behind your curtain layer - copy and paste Image7 as new layer and position on the left of your frame - copy and paste Image19 as new layer - resize 60% - free rotate 25% left - paste at the bottom of your plant -add Eye candy gradient glow with the following settings :


 copy and paste Image42 as new layer - resize 50% - position at the bottom of your plant over your ribbon layer - copy and paste Image15 as a new layer - resize 50%  - erase all of the stem - duplicate and position as shown - copy and paste Image13 as new layer and position at the bottom of your frame. Make sure it is behind all of your left elements - ADD ALL OF YOUR © and any name or txt you would like :)


Wednesday, September 7, 2011

Sweet As Candy


SUPPLIES NEEDED

PSP and Animation Shop
Scrap Kit : T.G.I.F by Butterfly Kisses Scraps. You can find this cute little kit HERE.
Tube used :  Alisha. I just love the work by Myka .... Just stunning! You can get all her cute tubes HERE.
Mask : 336 by Weescotlass and you can grab it HERE
Filters : Eye Candy 4000 Gradient Glow

Open new blank canvas 600 x 600 - selection - copy and paste Paper16 into selection - select none - layers - new mask layer from image - load your mask - merge group - gradient glow using the soft rainbow setting but adjust the glow width to 3 -hide mask layer -  copy and paste Frame05 as new layer - adjust - add noise - monochrome and uniform selected 70 - effects - gradient glow with the following settings :


with your magic wand tool select inside the frame - new raster layer - selections - modify - expand 7 - copy and paste Paper16 into selection - select none - copy and paste tube as new layer - position your tube so you can not see beneath her to the background - duplicate - position one tube on top of frame and one beneath - with your eraser tool erase the area of her body between the arms so she is sitting nicely on but behind the frame - copy and paste HeartCluster02 as new layer - resize 50% and position on bottom right of frame - gradient glow black with the same settings as the frame - copy and paste Sucker as new layer and resize 50% position behind your heart layer - with your eraser tool erase any ribbon of of the sucker that may be showing - Copy and paste Sparkles01 as new layer and position behind frame layer - copy and paste Ribbon04 as new layer - resize 70% - gradient glow - position on top of the frame and beneath the tube - copy and paste Butterfly02 as new layer and position on top - resize 30% - free rotate left 20 - mirror - gradient glow - position bottom left of frame - repeat all butterfly steps with Butterfly01 and position as shown - copy and paste Diamond01,02, and 03 as a new layer and position behind your butterfly layers as shown - merge all three down - gradient glow - duplicate and position as shown - copy and paste Flowers02 as new layer - gradient glow - position behind frame and paper - duplicate - position top flower layer at the top of frame above the ribbon layer - erase all of your flower layer except that one large flower that overlaps the ribbon-
Copy and paste Wire01 as new layer - mirror - gradient glow - position your wire as the top layer and move to the top left of the frame as shown - duplicate - position your second copy as the layer just above your mask layer - with your eraser tool erase the long strand of wire that cuts across the front and the little piece that covers the end of the frame.
Add all your txt and copy-rite and lets animate :)

Copy your sucker layer and paste as a new image - erase all of the stick ( you may want to make it large so you can get the fine white part off as well ) Crop around the sucker as close as possible - paste as new animation in Animations Shop - effects - insert image effect - rotate - length 1.9 sec - frames per sec - 17 - now delete all frames except for 1,2, and 3 - back in PSP ... copy merged - paste as new animation in AS - duplicate selected until you have three frames of your tag  - propagate paste - make sure your first frame is selected - select all - switch over to your sucker - select all - copy - switch back to your tag - paste into selected frame - position lined up as close as possible to match your other sucker - Save :)


Wednesday, August 31, 2011

Erotica


Psp and Animation Shop Needed

Scrap Kit used : Death Becomes Her. This kit was put together by one of the sweetest women I know. She is always there to lend a helping hand. The wonderful staff at PSP Asylum, Shani, and many others have opened up an amazing group called T.A.G (Taggers & Artists Giving). I think this is such an amazing thing to do. You can read more about T.A.G HERE. The scrap kit you can find HERE.

Tube used : Gothic Angel by the very talented Freya Langford-Sidebottom. You can find it HERE.

Mask 344 by Weescotslass found HERE.

Filters: Eye Candy 4000 Gradient Glow, Xero - Radiance, Alien Skin Xenofex 2 Constellation


 Open new transparent image 600 x 600 - selection -select all - copy and paste WP_DBH_PP8 into selection - select none - open your 344 mask - layers - new mask layer from image - 344 source luminance selected - merge group down - copy and paste WP_DBH_FILMSTRIPFRAME as new layer - resize 40% making sure all layers is deselected - add gradient glow with the following settings : 


Position at top of mask layer - close your mask layer - make film strip active - with your magic wand tool select inside each frame ... if you are unsure how to do this select inside your first frame holding down the Alt button while you select the rest - selections - modify - expand by 7 - add a new raster layer and paste WP_DBH_PP18 into selection - position behind frame - select none - copy and paste your tube with no wings as new layer position some part of the tube behind frame 1 to your liking - hide tube - make film strip active and with your magic wand select inside first frame - selections - modify 7 - invert - make your tube layer active - hit delete - select none (you may need to crop around the entire image if part of your tube hung over the canvas) - repeat your tube/strip step for the remaining strip using different parts of the tube - merge all body parts down as one - add xero - radiance with the following settings : 128, 50, 128, 255 - make your strip layer active and duplicate it 3 times for a total of 4 - on your first strip add Alien skin constellation with the following settings :

Repeat your glitter on the other 2 strips changing only the random seed - leave the bottom strip free of glitter - copy and paste WP_DBH_PP3 as new layer and position at the bottom of all layers - crop around canvas - make your mask layer active - adjust - add/remove noise - 70 - copy and paste WP_DBH_TRUNKS as new layer - position as top layer - resize 40% - copy and paste winged tube layer as a new layer and position towards the bottom-center as shown in mine above - add gradient glow with the same settings as before - copy and paste WP_DBH_FLAMES as new layer - resize 83% and position it the rest of the way yourself so it fits evenly along the sides - Position behind all layers except mask and background - copy and paste WP_DBH_LOOPYWIRE as new layer - resize 60% -  position at the top of the strip layer as shown - move beneath the strip frame layer - duplicate -flip - position this layer on top of the frame making sure it is above the glitter as well - paste WP_DBH_CIRCLESPLATTER as new layer - resize 75% and position on beneath your tube, chest, and flame layer - gradient glow  - copy and paste WP_DBH_ARCH as a new layer - gradient glow with the same settings but change the colors to a purple - resize 75% - move to the right hand side as shown - duplicate - position the bottom layer underneath all layers except mask and background - position the top layer above all layers except the chest and tube - with your eraser too erase the bottom half of your top arch layer - duplicate the bottom arch layer - mirror - duplicate - position the top arch layer - position the top layer above all layers except the chest and tube - with your eraser too erase the bottom half of your top arch layer - copy and paste WP_DBH_ARCH one more time - resize 90% position in the center - repeat your glow and duplicate/erase steps - copy and paste WP_DBH_STAINEDGLASS - resize 15% gradient glow - position over the circle of the arch - duplicate and repeat for the other 2 circles - copy and paste WP_DBH_LEATHERCORSET - resize 30% - add a drop shadow to your liking - position bottom left - copy and paste WP_DBH_BOOT2 as new layer - resize 35% - drop shadow - position bottom left - copy and paste WP_DBH_WHIP1 as new layer - resize 41% - free rotate 20 to the right - position on top of corset and boot as shown - duplicate - position bottom layer behind boot layer - with your eraser tool erase the strings of the whip so it runs behind it - copy and paste WP_DBH_TRIBALORCHID as new layer - resize 41 % position behind your boot, corset, and whip - duplicate - mirror - position as shown - copy and and paste WP_DBH_ROSEBREANCH - resize 25% - duplicate - on the top layer change blend mode to screen and merge two together - mirror and position as shown - copy and paste WP_DBH_ROSE as new layer - resize 50% and position as shown - Add a new raster layer and position at top - effects - 3D effects - buttonize - height and width 2 solid and select a pretty purple - Add all © You can use the same wordin I have or pick your own. I have chosen part of the lyrics to Erotica by Madonna. :)
Now to animate this baby.....
Open animation shop - in paintshop pro make sure your top 2 glittler strip layers are closed - copy merged - paste over into animation shop - back in psp close your bottom glitter strip and make middle strip visible - copy merged - paste after current image - repeat with the last glitter frame - save - All through all done!